Tomato Setup Guide
Got your fancy custom firmware router? Put Windscribe on it!
Buy preconfigured router: FlashRouters.
Step 1
Get OpenVPN Config file and credentials (requires a pro account). You will also need the CA Cert and TLS Auth Key.
Step 2
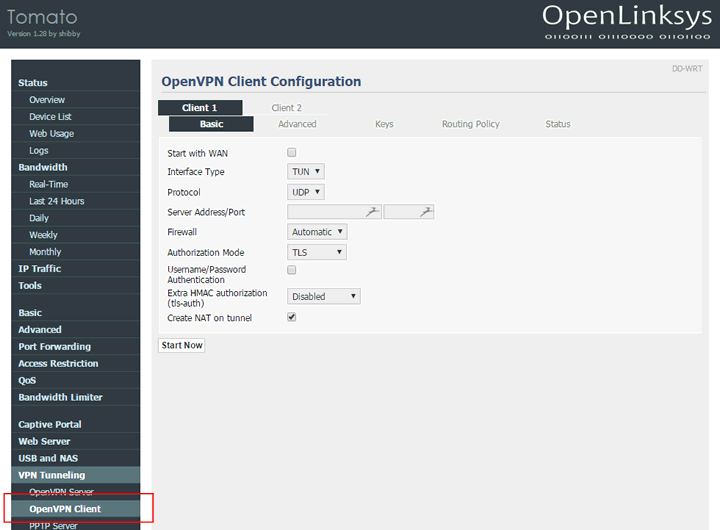
Open up the Tomato control panel, and click on the "VPN tunneling" tab, and then select "OpenVPN Client".
Step 3
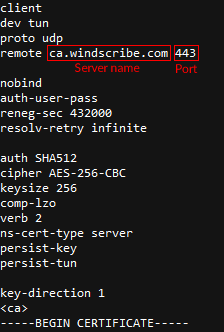
Open the .ovpn config file you downloaded in Step 1 with a text editor and find the line that says "remote". You will see xx.windscribe.com, xx = country of your choice. This will be the the "Server Address/Port". The number that follows is the "Port".
Step 4
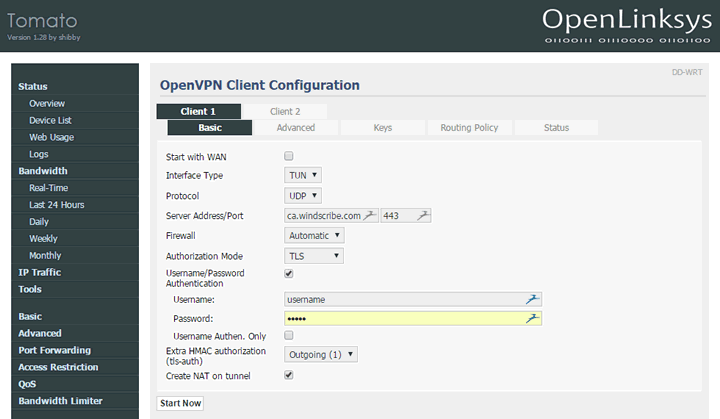
Fill out the remaining fields as follows:
Interface Type: TUN
Protocol: Depends on your selection in Step 1. This could be UDP or TCP. Leave as UDP if you are unsure.
Server Address/Port: Hostname from Step 3
Port: Port from Step 3. Make it 443 if you are unsure.
Firewall: Automatic
Authorization Mode: TLS
Username/Password Authentication: Checked
Username: Username from Step 1. This will be different from your Windscribe username.
Password: Password from Step 1. This will be different from your Windscribe password.
Extra HMAC authorization (tls-auth): Outgoing (1)
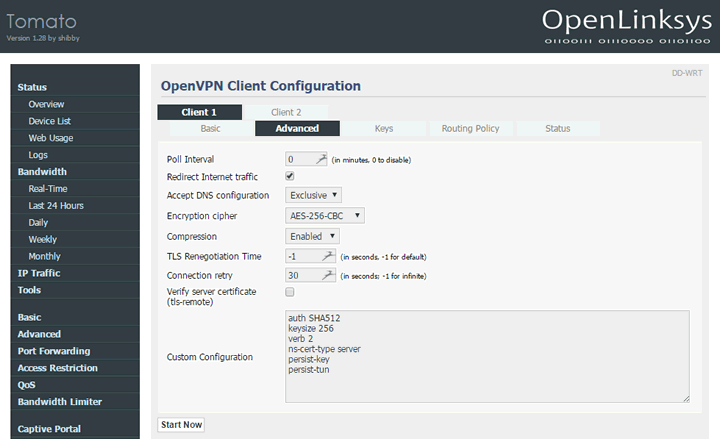
Click on "Advanced" tab.
Redirect Internet traffic: Checked
Accept DNS configuration: Exclusive
Encryption Cipher: AES-256-CBC
Compression: Disabled
TLS Renegotiation Time: -1
Connection retry: 30
Verify server certificate (tls-remote): Unchecked
Custom Configuration: Copy/paste from below:
auth SHA512
keysize 256
verb 2
ns-cert-type server
persist-key
persist-tun
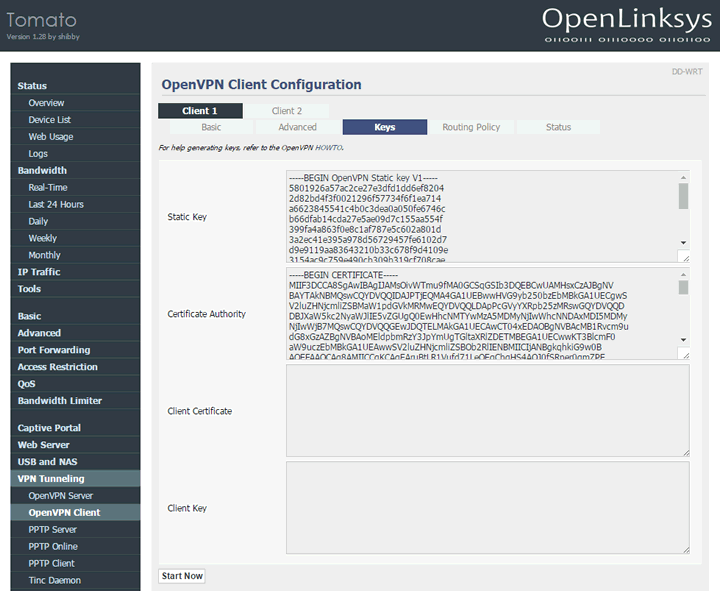
Click on "Keys" tab.
Static Key: Paste contents of ta.key from the .zip you downloaded in Step 1. You should open it via a text editor.
Certificate Authority: Paste contents of ca.crt from the .zip you downloaded in Step 1. You should open it via a text editor.
Your screen should look something like this:
Step 5
Click "Save" at the bottom. After page refreshes, click "Start Now".
Step 6
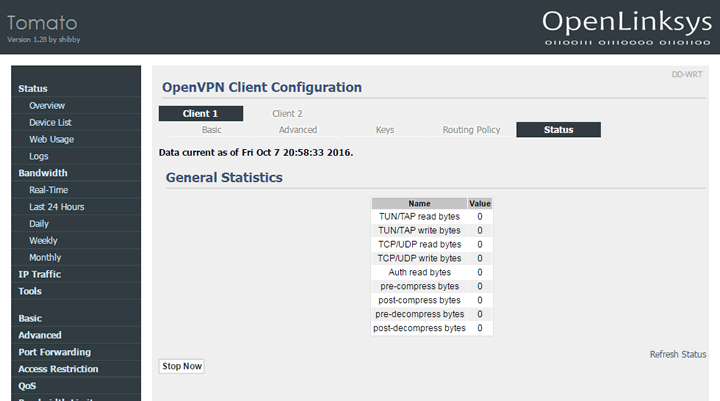
Click the "Status" tab at the top. The screen should look similar to this.
Step 7
Congrats, you successfully setup Windscribe on your router.